Drawing and Erasing, and Erasing

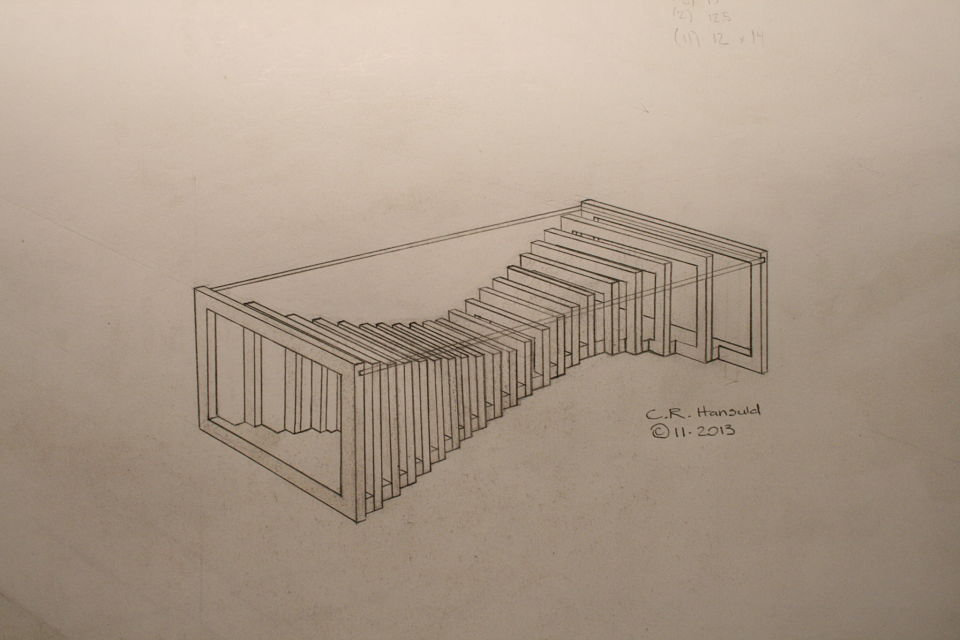
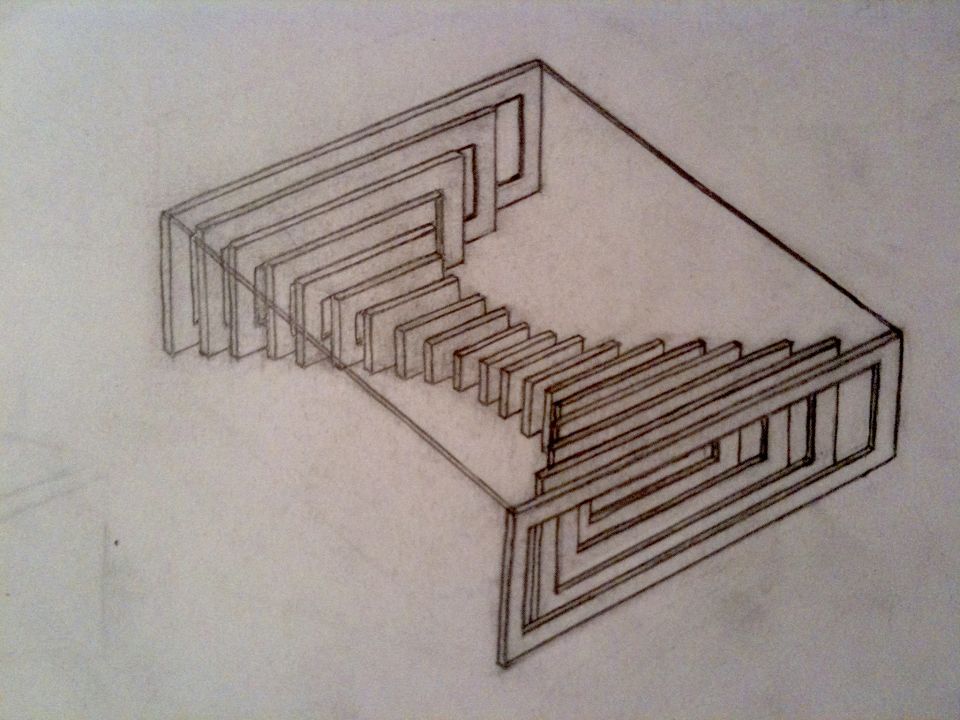
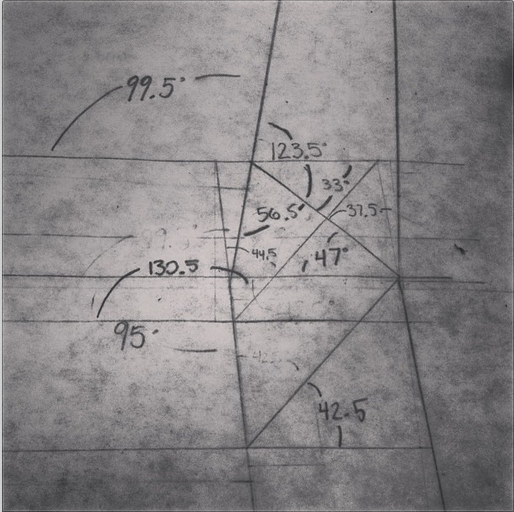
This week I have spent a bit of time sketching Coffee Table No. 1  for a new client who is looking to commission the same table, just bigger, and rectangular.  In order to work through the design in my own brain and determine pricing I needed to work out the piece in scale on paper. The top view and side view of the table are done to scale and are more for my benefit, the perspective drawing is to scale as best as my eye could accomplish and is more so there to give the client an idea of what the piece will look like. Drawing is something that always takes me a long time. There is a lot of layout and erasing that happens, a LOT of erasing. It is something that I am constantly improving at, for the sake of reference I have the perspective drawing from the original coffee table design that I sold a different client this time last year. Gives you a bit of insight into how my drawing abilities have progressed in even just this last year.

As my aesthetic develops into designing pieces using lots of parts to achieve an overall greater form I wonder if my time might be better spent learning how to design on a computer. At the end of the day I just enjoy drawing by hand, probably for the same reasons I enjoy making furniture by hand. Not to mention I think there is something kind of special nowadays about showing up to a clients home with a sketchbook and a pencil to show them concepts rather then a laptop.

IMG_6402_opt IMG_6405_opt

IMG_1395_opt


The Indestructible Miter

Before you get into this, I am sorry, this post is long, it may or may not make a lot of sense, and I am sure a lot of people would argue with what I have said. Carry on. Indestructible miter. A bold claim I know. Indestructible and miter are words that do not often go together. The miter opened up, this mitre won't close, why did I choose to use these damn miters, all a lot more common to hear.

But bear (bare?) with me here, what you are about to see below is an adapted version of a joint that was introduced to me as "the indestructible miter." Or if you would like to take it down a few notches on the "awesome scale" the plywood L-tenon. It is exactly as it sounds. Plywood and indestructible are again two words we are not used to hearing together, but it is the perfect material for an L-Tenon.

Why you may be asking? Alternating grain direction for maximum strength. It is really just that simple. Miters are difficult to join because of the amount of end grain in the joint (end grain has no glue strength). This is why typically we cut keys or splines in a miter joint is to gain some "face grain glue surface."

But isn't half of plywood end grain? Sounds like you are going against your own advice....

You got me, it's true, but the other half is perfect face grain to face grain glue surface. And the end grain portion on the one side of the miter is the face grain on the other part of the board. Tricky no?

But there's another part to this equation. Keys / splines and most other miter "joinery" has very little "depth" into the actual boards. This may be okay for little boxes, or a casepiece, but chairs are under stress, a lot of stress, and they need something a little more substantial. The "L-Tenons" allow me to route deep (in this case around 2") mortises into both parts.  What I end up with is a 2" worth of tenon (and a longer bit could get me more) into either side of the miter. Quite a bit of depth all things considered. Couple this with the alternating grain and you have a joint that is "indestructible," relatively speaking anyways.

This may be a lot to take in at this point, hopefully the pictures will clear it up some. For the record these are a bit of a variation on your standard "Plywood L-Tenon" as they are obtuse angles and canted as well. Testing as to the actual strength will commence once the stool is together. Stay tuned.

IMG_6368_opt IMG_6367_opt IMG_6362_opt IMG_6360_opt IMG_6358_opt


Drawing and Reality

So with the mock-up complete for Bar Stool No. 3 it was time to move on to a more detailed full scale drawing. Below is a drawing that the more I tried to simplify it the more complicated it appeared. The result was my brain getting pretty mushy and working on something else for the morning (see the post about dodecahedrons). In the end I needed to trust the angles and dimensions I had laid out and went to cutting the compound mitred frames that will make up this stool. The picture at the bottom is with the angles cut and pieces of tape wrapped around the outside of the miter to see how everything fits together. I should have been able to visualize this from my drawing (maybe?) but was pleasantly surprised when I began piecing the parts together and revealed the "double mitre" joint that will be visible from the back of the stool.


Dining Chair No.6 Awaiting Pickup

Recently finished the run of Dining Chair No. 6 with a matching bench. The version you see are about 1.5" taller then standard to accommodate a tall family and accompany a 33" tall dining table (3" taller then standard). Made from local black walnut with black leather upholstery.  

IMG_5903_opt