Valet Chair

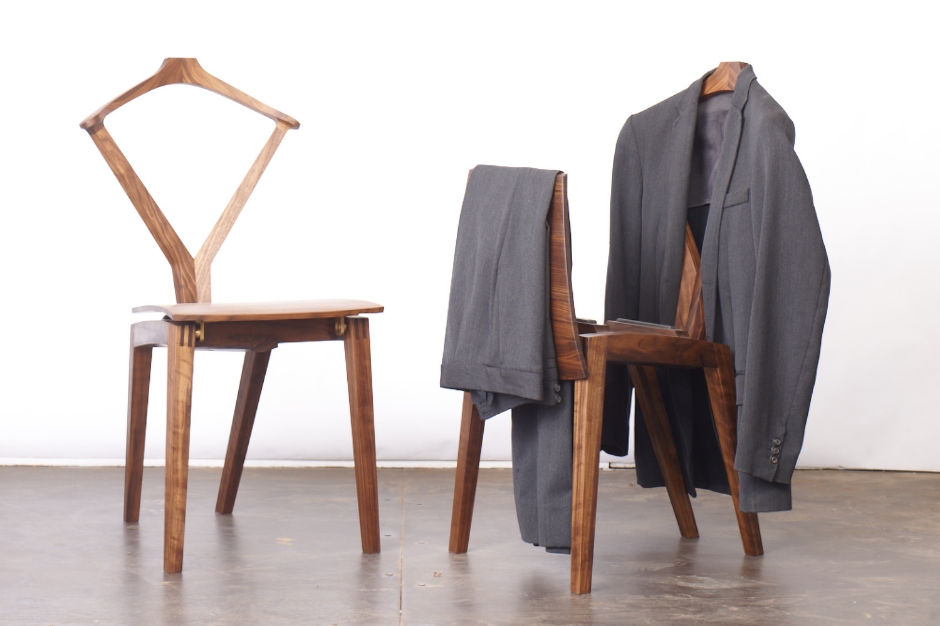
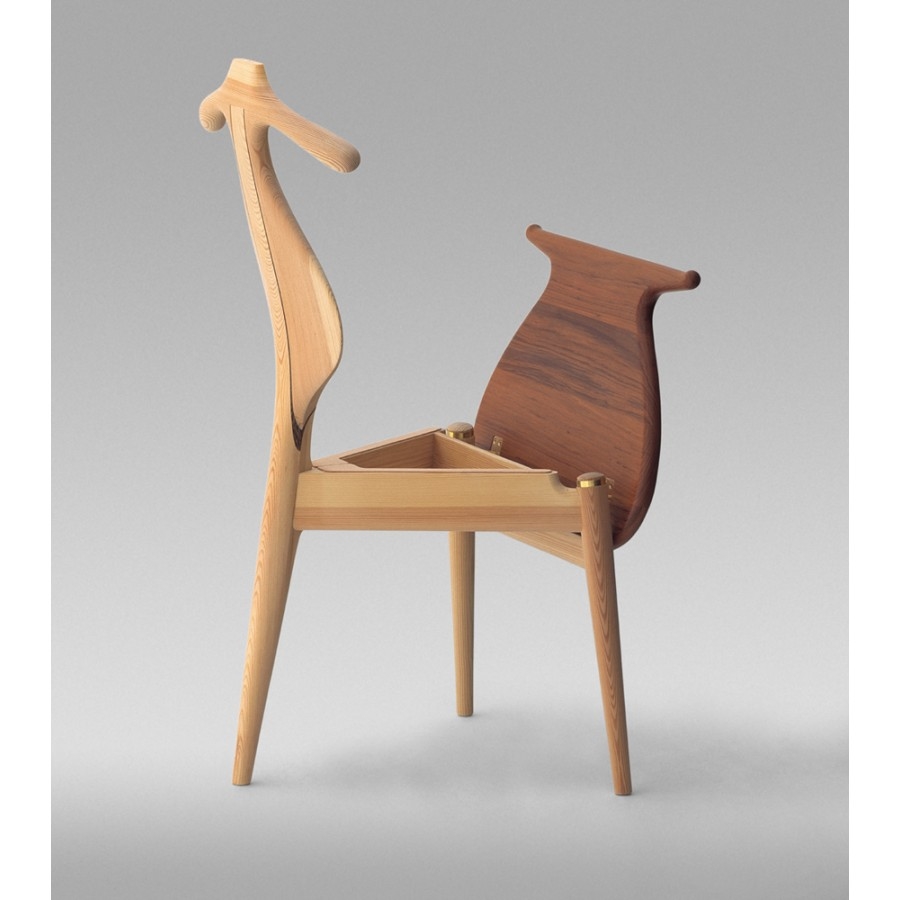
At the end of 2014 we finished up a commission for a custom valet chair. The customer was fond of our aesthetic and wanted to see what our take on Hans Wagner's iconic Valet Chair (1954) would be.

Hans Wagner - Valet Chair (1953)

Hans Wagner - Valet Chair (1953)

As par the standard commissioning process we created 3 concepts for the client, what's below is the one he wanted to see become a reality. For those not familiar, the valet chair is intended to be a chair that accommodates getting dressed / undressed. The back of the chair (like many chairs) is to hang a suit jacket/blazer. What's unique from many chairs is the "clothes hanger" section is shaped to replicate ones shoulders, (higher end jackets often have horse hair pads in the shoulders, the shape of the shoulders helps to keep the shape of the jacket). This was the only real criteria from the client, he even provided a hanger to reference. 

The seat on the chair hinges from the front edge providing a place to fold / hang trousers over as well as exposing a leather lined compartment for ties / belts / cuff links / wallet / phone / keys and anything else you may want to store. 

This valet chair forced me to evaluate a different set of requirements within a familiar form. Yes, like all chairs this one needed to be strong, and have an appealing aesthetic. Where it differed is the emphasis on this chair was not in comfort (it did turn out very comfortable by coincidence), but instead in creating a chair that one could easily and intuitively get dressed / undressed using day in and day out. 

Below are the original two valet chairs created in walnut, with leather details and custom fabricated brass hinges. 

valetchair
valetchairfront
suitchair
bridle


You call that a form?

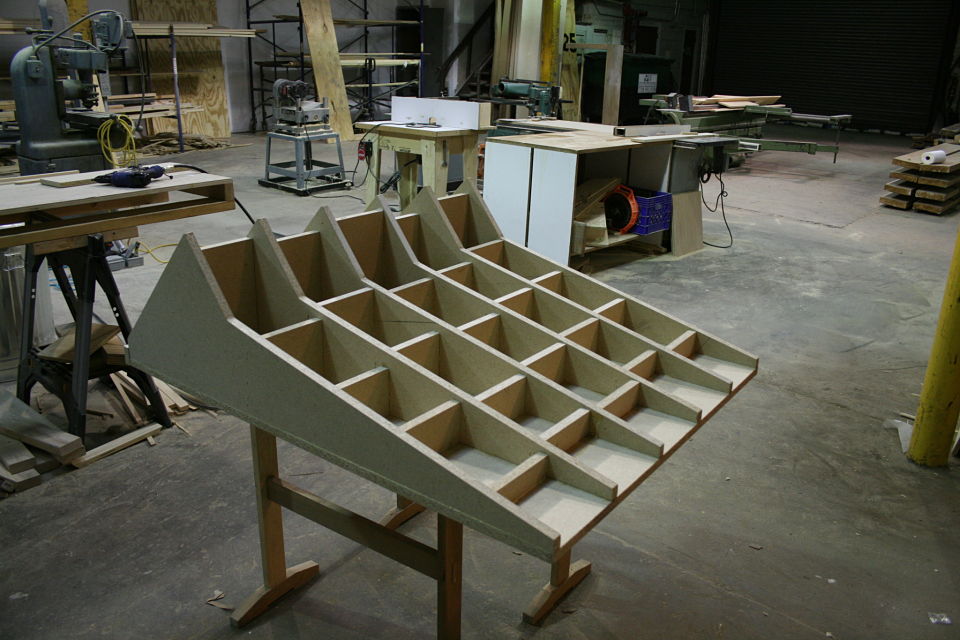
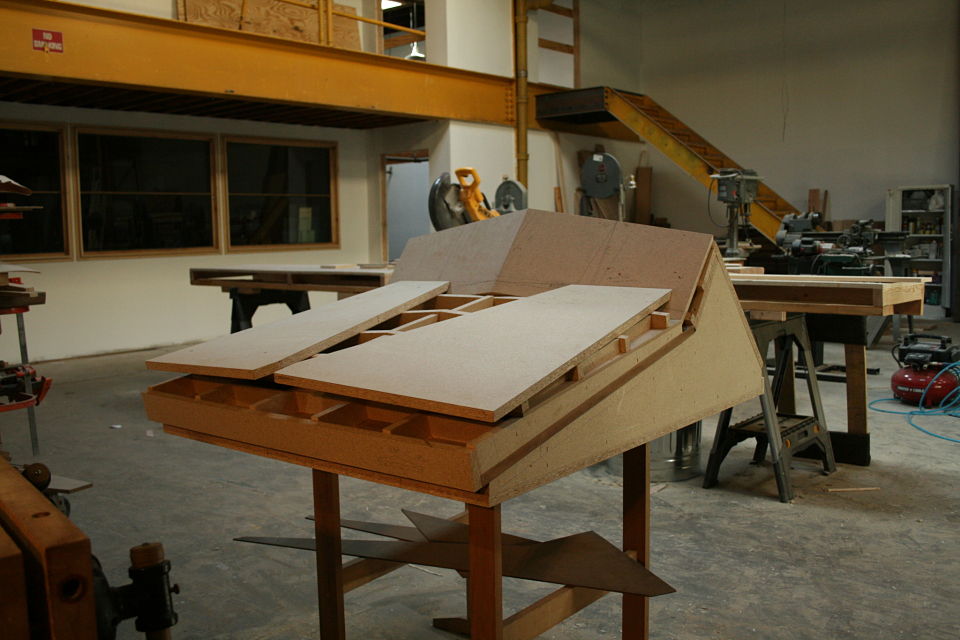
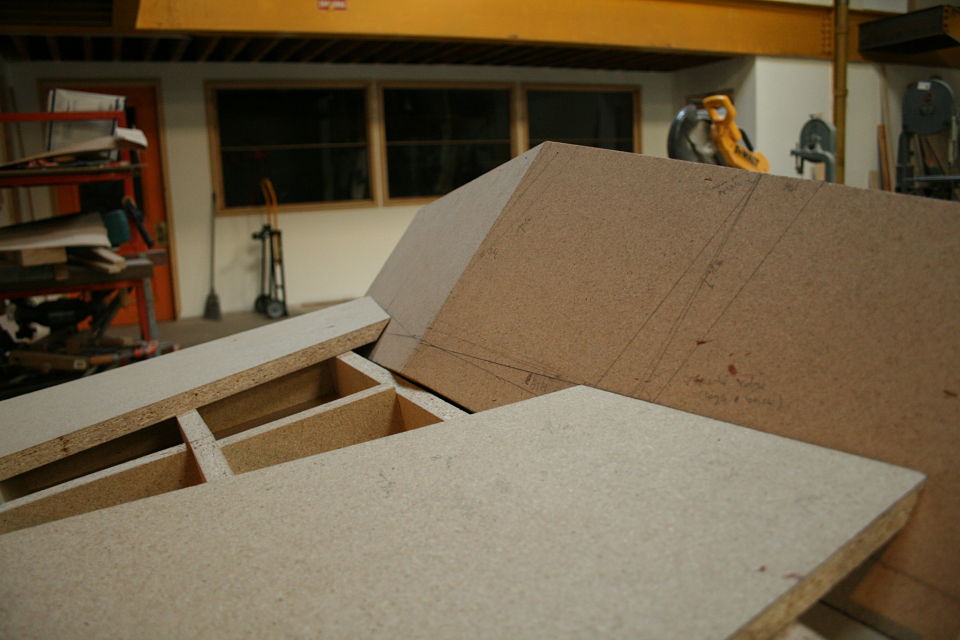
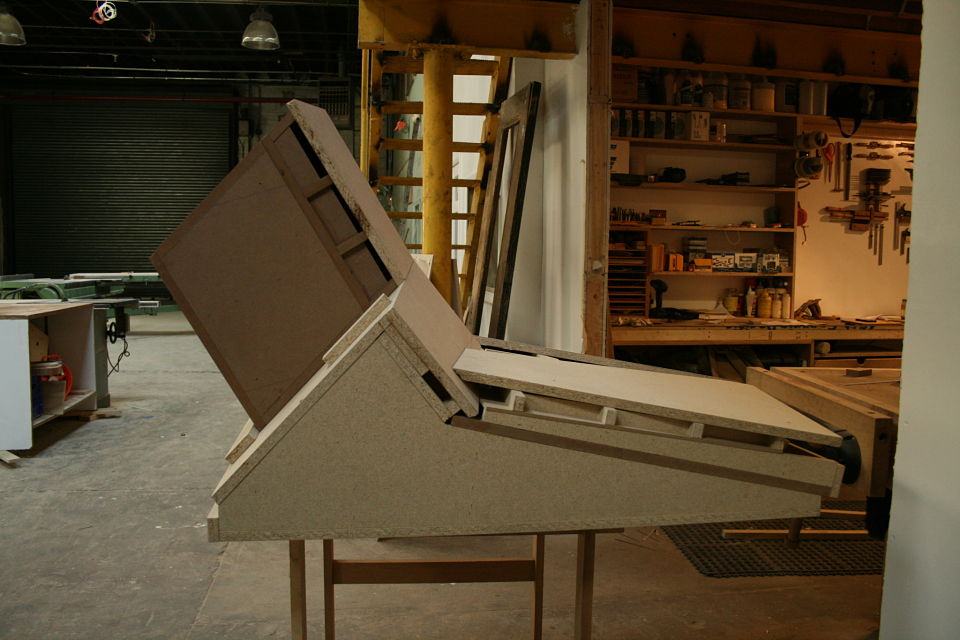
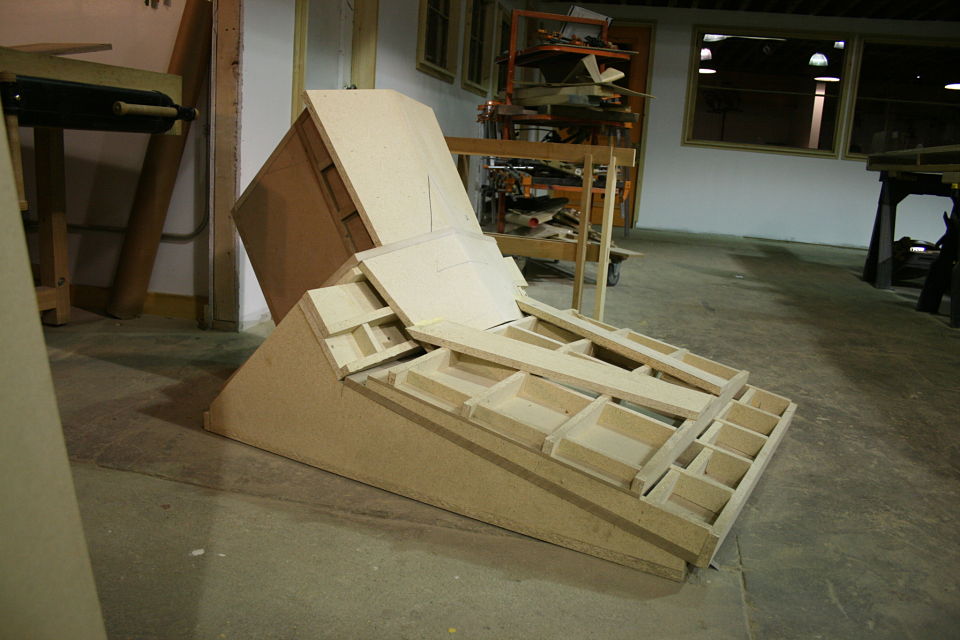
It has been quite the journey since proving the folded paper concept could work. I have gone through many, many sheets of particle board / mdf and more coffee than I care to admit. It has taken days to build, and days to refine and alter. This form could likely keep the building from flying away in case of a hurricane at this point. I am not entirely sure how I managed to sort it all out, but somewhere amongst the caffeine and sleepless nights  (possibly related) I sorted through the angles, and the angles where angles meet angles.

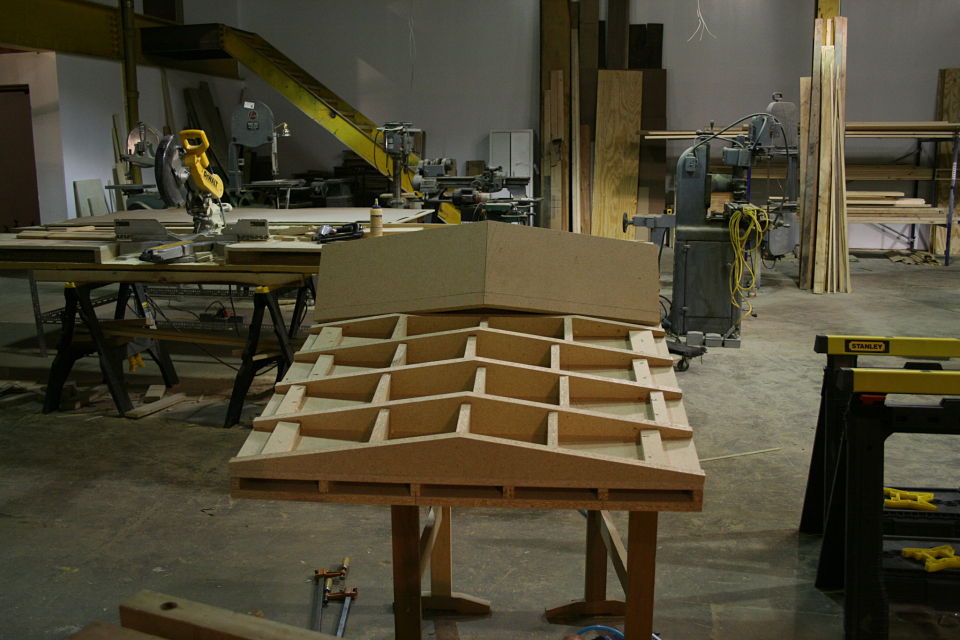
The form is composed of 6 separate torsion boxes. Together they give me the angles I require, or at least I certainly hope so.

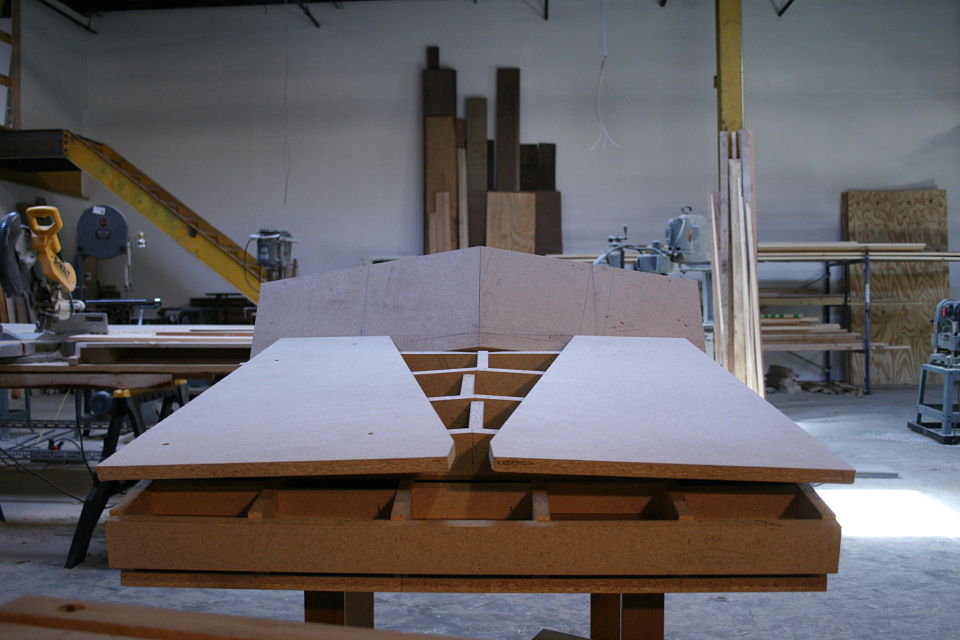
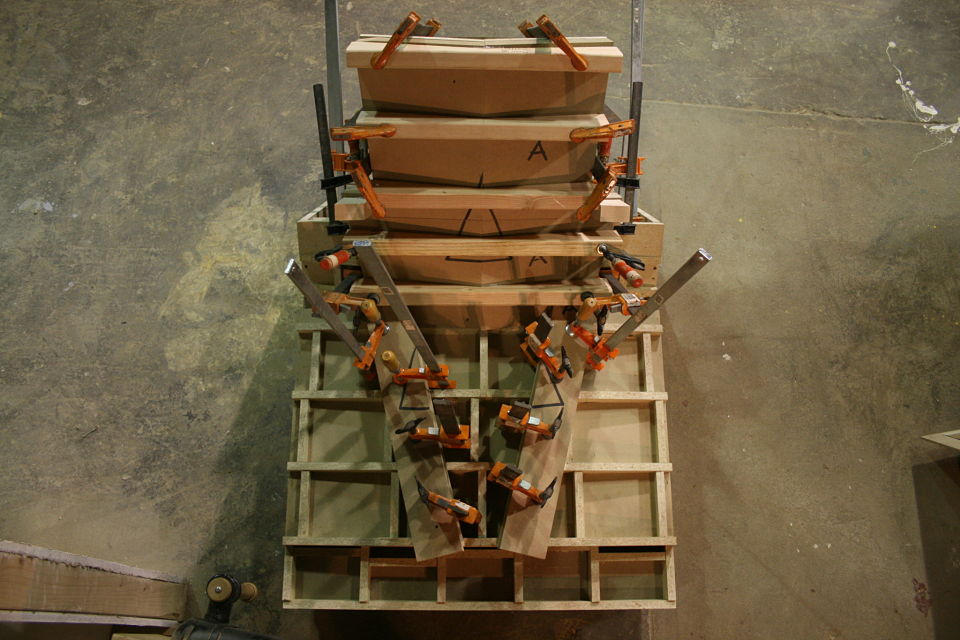
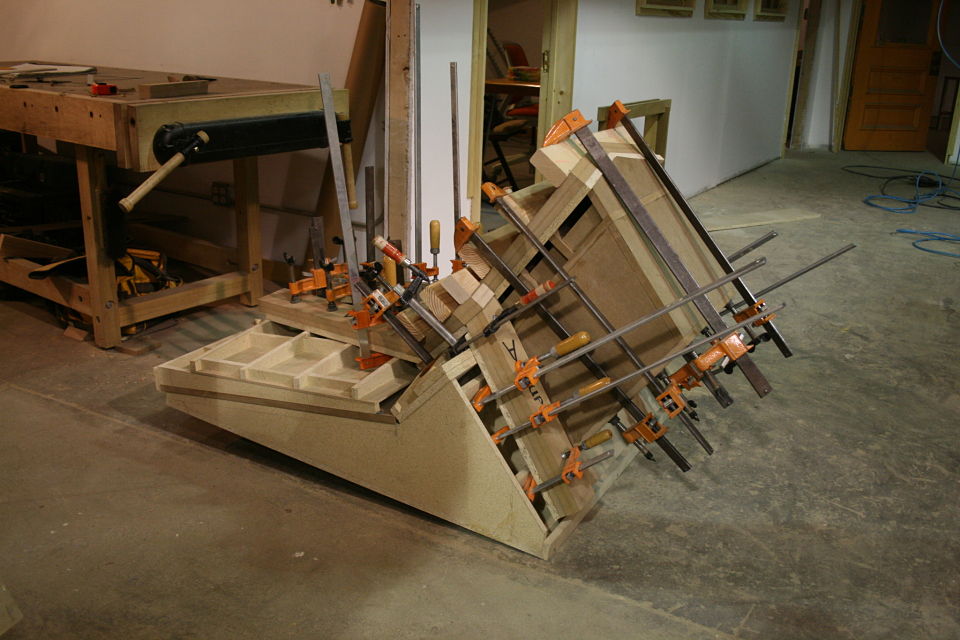
With the form "complete" I needed to devise a clamping strategy (no way this contraption was fitting in the vacuum bag). A clamping caul system was the only way I could conceive making it work, and so the adventure of making an elaborate set of clamping cauls began. 1.5" thick mdf formed the platens (compound angles meeting compound angles) that would sandwich the veneer with "sprung" beams running across them. Because I won't be able to get a clamp into the center of the panel and I don't own any 12" deep clamps I needed to "spring" the beams. Basically the beams are touching in the middle (peak of the triangle profile) of the platen and around an 1/8" high on each end where the clamping pressure will be applied. As the clamps get tightened they will close that 1/8" gap creating more pressure in the middle of the platen. Simple stuff really.

This is the first of two forms that will be used to make the chair. This one will be used to create a bent ply panel that will form the back rest, arm rests and back legs.


IMG_6707_opt IMG_6719_opt IMG_6728_opt IMG_6730_opt IMG_6741_opt IMG_6746_opt IMG_6750_opt IMG_6752_opt IMG_6758_opt IMG_6774_opt IMG_6779_opt


Origami Chair

This past autumn I was commissioned to build a chair by a student in the Chair Design class I was co-teaching with Jeff Miller at the Center for Furniture Craftsmanship. During the brainstorming / model making / getting creative energy flowing exercise the student (Jed) came up with a captivating model by "simply" folding paper together into the form of a chair. I wish I had decent pictures of the model, but let me tell you, Jeff and I were both immediately drawn to this concept and the potential it had. After a day or two of head scratching our collective brain power was getting pretty mushy, Jed's chair was redesigned capturing some of the elegant lines the model had into a design Jeff, Jed and I were confident in Jed being able to build in just over a weeks time. By the end of the class Jed had created a striking, sit able chair, but he longed to see that original folded together model come to life. Jed commissioned me to make the original design, the endeavour took on a new life.

I knew I had gotten myself into a pretty hefty challenge, but let me tell you, I greatly underestimated what lay ahead. Fold some veneer here, fold some veneer there, voila, chair. I knew it was going to be labour intensive, but what I did not anticipate was the mathematician level of trigonometry / master origami problem that lay before me.

I started in my sketchbook (like always) and came up with a few reiterations of the chair I was content with and started trying to decipher just how to build one of them. After more head scratching I realized I was chasing the wrong concept altogether, and that in reality I wasn't pleased with any of the three concepts I was initially working on. I was trying to merge Jed's original model, his finished redesigned chair and something I thought would be comfortable into a pretty little package. I had ended up in a place with a chair that lacked a cohesive look and feel, I reached out to Jed wanting to discuss the project with him. Jed had no interest in seeing and adding input on the designs, he wanted me to find the right design for myself, to look past the hangups and let my voice be heard. It was a deflating and empowering moment all at once. I took a long walk, enjoyed some fresh air, and realized I needed to go back to the start. I got out the paper, and for what seemed like days folded together both model sized and full sized chairs. From here my current concept was born. I ended up straying a bit from the original model Jed had folded together back in September, but have found a direction I believe will lead to a very unified, refined looking piece.

The plan is to make the chair out of just two parts, seems easy enough right? The first part will be a bent panel that makes up the back rest, arm rests, and back legs of the chair. The second part will be a bent panel that makes up the front legs, seat, and another set of back legs. The two panels will then be joined (glued and bolted) up the back leg. Both panels will be pressed out of commercial veneer with alternating grain direction to essential be shop made plywood, this way it will be strong and stable. There will be relief cuts in the veneer to allow for the panels to split apart (top of the back rest and front of the seat) where the panels change the plane they are being bent on.

Pictured below are a few (of what seems like hundreds at this point) of my mockups. They are cut from paper, cardboard, and one version made out of plywood to get something rigid enough to take angles from and sit in to work through ergonomics.

I know it doesn't seem like much yet, but stay tuned, this will be a learning intensive journey for everyone involved.

IMG_6636
IMG_6636
IMG_6666_opt
IMG_6666_opt
IMG_6676_opt

IMG_6676_opt

IMG_6696_opt
IMG_6696_opt

Rocking Chair Debuts at the Interior Design Show

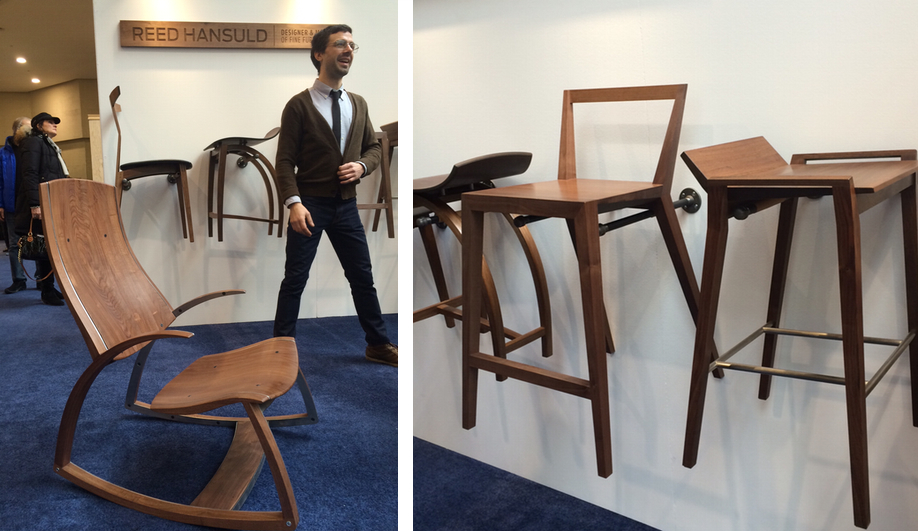
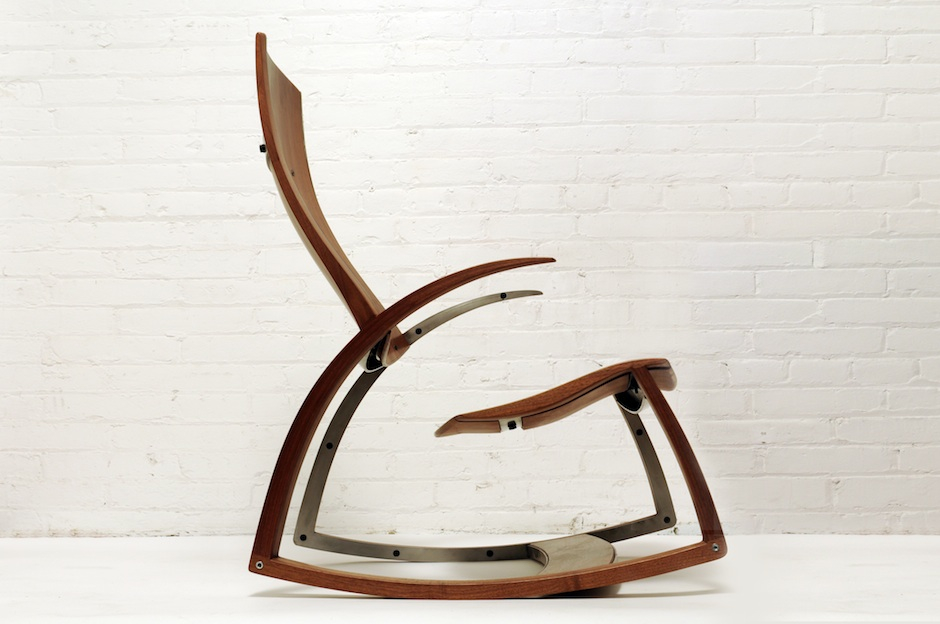
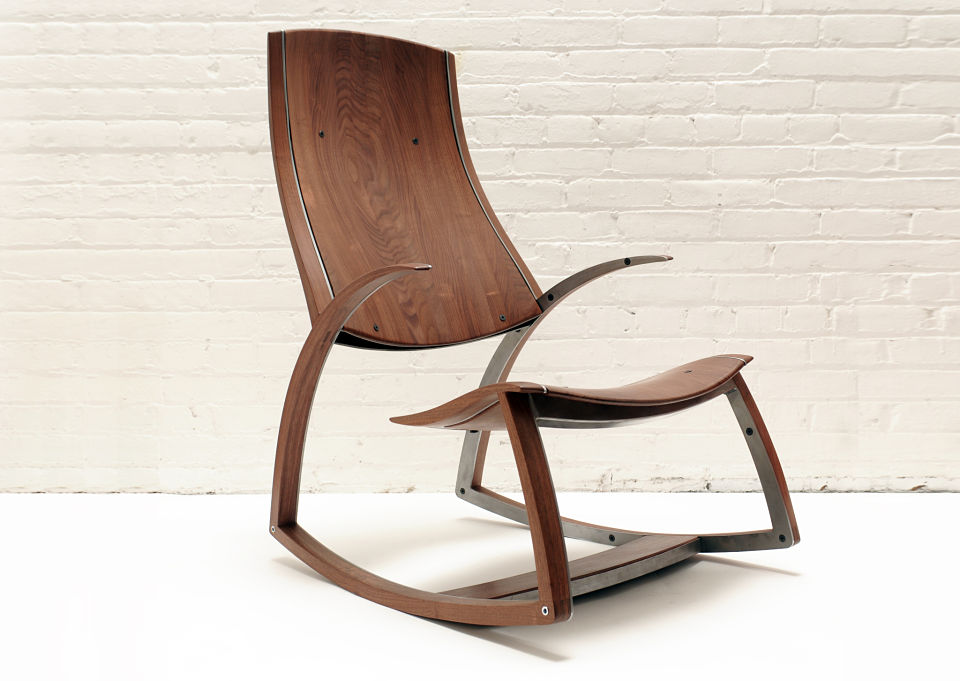
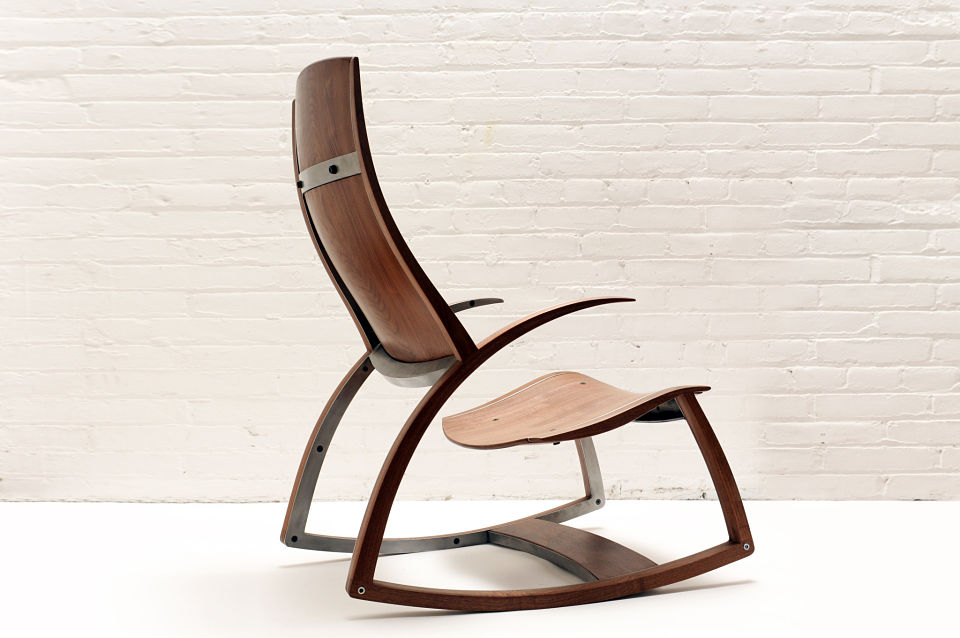
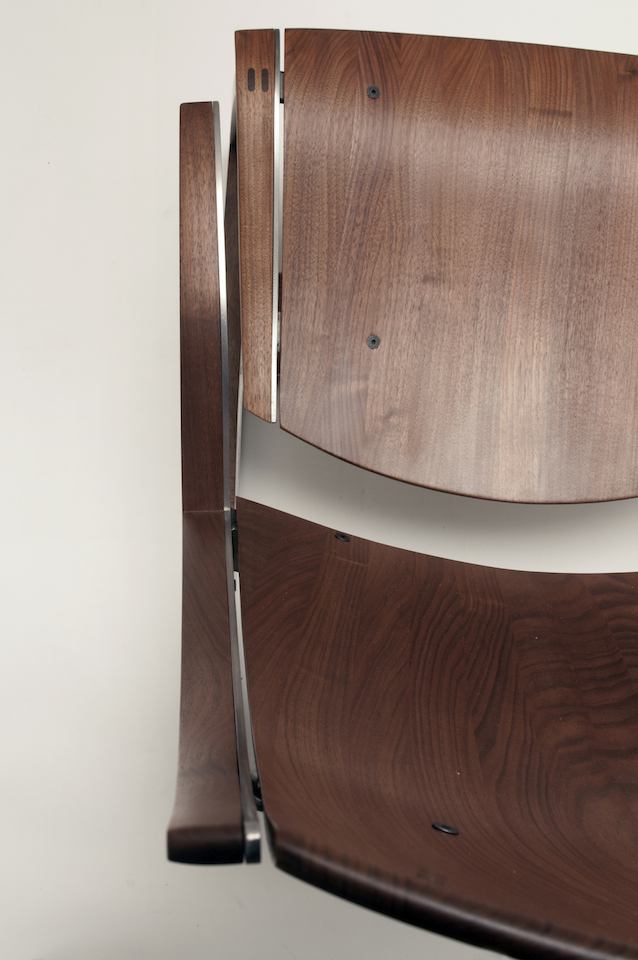
Azure-Emerging-Reed-Hansuld-2I know it has been a long time between posts, the business and life side of all this took priority for a little while. Through January and February I was preparing for and exhibiting at the Toronto Interior Design show as well as relocating to Brooklyn, New York. In this post is a picture from the show as well as the most recent piece produced, Rocking Chair No. 1.  It is walnut construction with a steel subframe, the steel gives the piece the structure it requires to take the load of a person. The cool (and somewhat unexpected) thing about it is the chair has no noticeable flex from the cantilevered seat or back, but has a slight flex side to side. It allows the back and seat to move independently from one another as the sitter adjusts in the chair.

I will go back in the coming weeks to post the process of creating this chair as well as posting about a new chair commission I am in the midst of currently designing.

Thanks for following, hope you enjoy.

DSC_6824-editSmaller DSC_6863-Edit_opt DSC_6912-edit_optDSC_6952editSmaller


Bar Stool Prototype

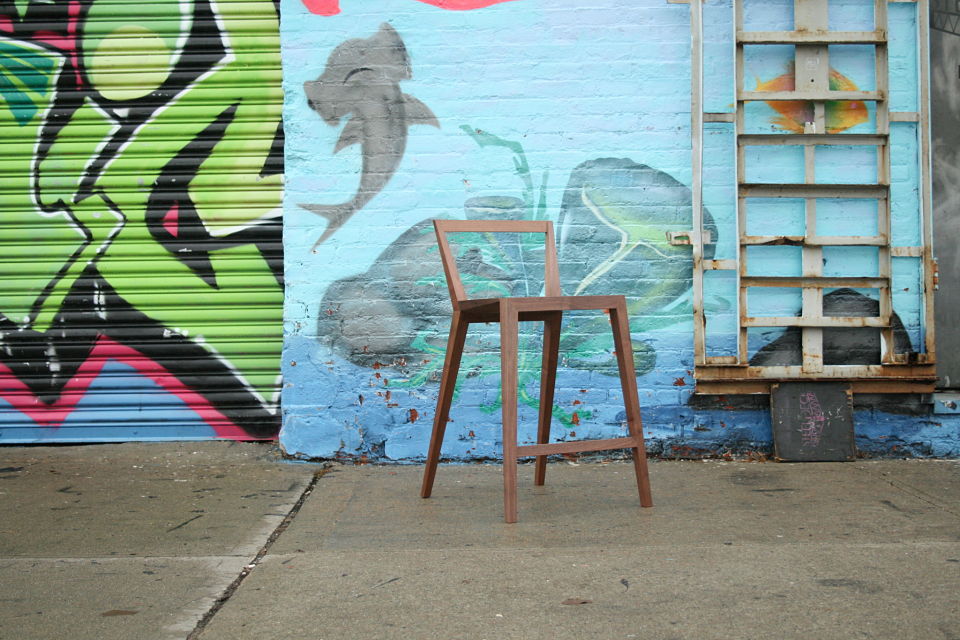
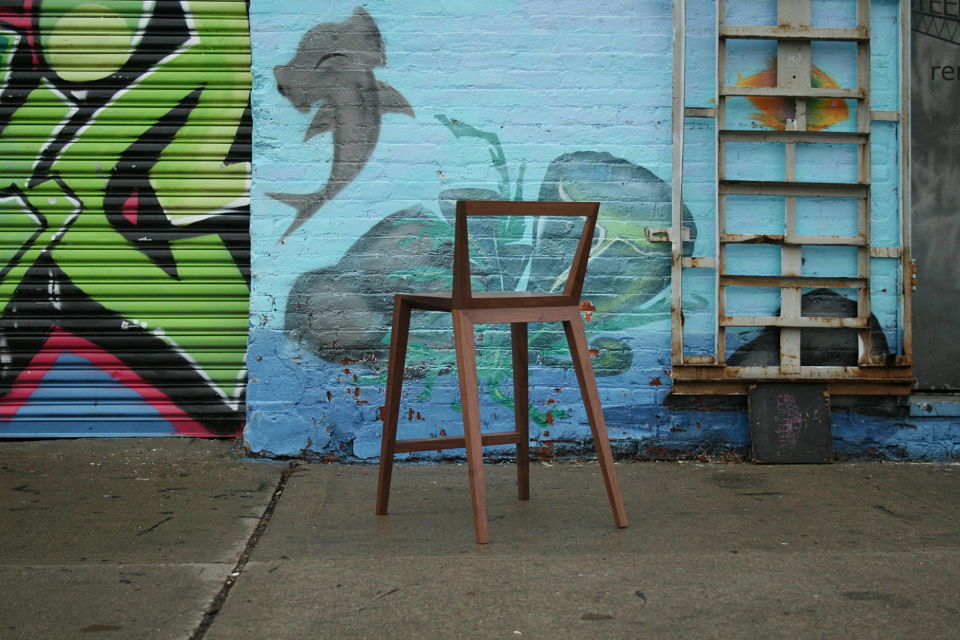
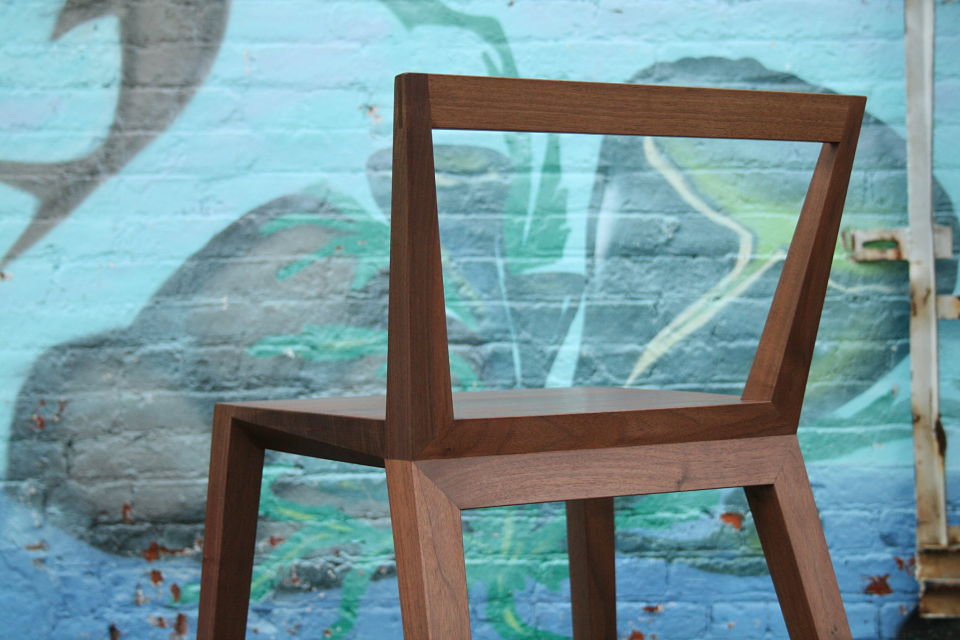
IMG_6582_opt Recently finished up the walnut prototype of the counter height bar stool I began designing while co-teaching the chair design workshop with Jeff Miller at the Center for Furniture Craftsmanship this past October. The minimal structure and clean kinked lines was inspired by a students chair design. The miters joining up in the back of the stool to give the "birdsmouth" look came about as a bit of an accident, a pretty happy accident perhaps going back to my days sharing studio space with Brian Reid.

Already there are some changes I think I would make in the next reiteration. For one I think I would like to pull the foot of the back leg in a some, the stance is a little too extreme for my taste. A wise chair maker once told me, "every chair you ever build is a prototype, you will always see improvements you can make no matter how many of them you have made." With that said I would like to welcome the counter height bar stool no. 3 to the family and look forward to testing this one out and developing it as time goes on.

IMG_6562_opt IMG_6569_opt